


Part identification in manufacturing: A mark of improvement

A material handler at a heavy fabrication operation reads a number written on a batch of parts, attaches the appropriate job traveler, and moves the batch on to the next operation. When the batch reaches the welder, he does a double take. The parts are cut incorrectly, in the wrong orientation, so he has no choice but to scrap the entire batch. How did this happen? The prints in the job traveler are right there.
He takes a closer look at the job traveler, then the job number on the workpieces. The job number in the packet and the job number on the cut pieces don’t quite match. Then he looks at the number on the part only to see it is smudged—illegible—because it was written on a dirty work surface. The result was unnecessary rework.
How could this have been avoided? While metal fabricators spend a great deal of time ensuring they have the right welding gun, the right punch or die, the right saw blade, they all too often spend little time thinking about one of the most fundamental tools of metal fabrication: the industrial marker (see Figure
What Is an Industrial Marker?
Industrial markers are nothing like common office supply markers, which are created for writing on paper in offices, schools, and homes. Like any manufacturing tool, an industrial-grade marker has been engineered to withstand the harsh demands of some of the world’s most extreme environments. The four most common categories are:
Ink markers. Perhaps the most common, ink markers are dye-based and best for marking on paper, cardboard, wood, and other porous surfaces. They dry fast and are easy to use, but perform poorly on metal or other materials that are rusty, oily, or wet. Industrial ink markers are engineered with harder nibs for a longer marking life on harsh job sites. They also have specialized ink formulations that are more resistant to moisture and wear.
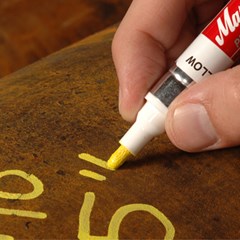
- Liquid paint markers. These are pigment-based and are designed to produce bright marks. They dry more slowly than ink, but create clean, legible marks. They include a range of specialty formulas for writing on metals coated with rust, water, or oil.
- Solid paint markers. These are also pigment-based but have no nib (that is, a marker tip) and are not damaged by rough surfaces. While solid paint markers can take a few minutes to an hour to dry, they are long-lasting and economical.
- Welding markers. These are typically made of two materials. Soap-stone welding markers are common, but they can break and don’t provide the most durable marks. Welders’ pencils offer improved durability, more precise marking, and greater visibility.
How Paint Markers Work
Paint markers have become increasingly popular in metal fabrication. They have various chemical additives to aid in their performance, but the three main components are pigment, solvent, and resin. It is the balance and chemical reactions between these components that determine how the markers perform.
Pigment gives the marker its color, and the level and kind of pigment you need depends on the application. A harsh application, such as one involving heat treating or a pickling bath, requires a marker with highly specialized pigments. In fact, most metal applications can benefit from markers with extra pigments, which can help make the marks on the parts brighter and more visible. This allows you to see part numbers from farther away and in low light.
After you make a mark, the resin dries and chemically binds the paint in place, which gives the paint its advanced water and wear resistance. Some resins withstand ambient temperatures up to 150 degrees F before breaking down, while others can hold their shape and color up to 1,800 degrees F or more.
The solvent keeps the paint in a liquid state inside the marker itself. Once you write with a marker, the solvent also helps the pigments and resin flow onto the surface of the metal. You may notice its distinctive smell when writing with a marker. That’s the smell of the solvent evaporating. As the solvent evaporates, the resin then dries onto the surface and chemically bonds the pigments onto the metal.
Industrial markers are also defined by characteristics of the tip, or nib. A marker with thin paint will have a nib with less porosity than a marker with thicker paint. If a nib is “tight” (that is, has less porosity), thick paint will have difficulty flowing through it.
The nib diameter dictates how fine a mark you can make. Most industrial users stick with a marker with a 1⁄8-in. nib. But if you’re going to be making fine marks, or marks in tight spaces or corners, you may consider using a 1⁄16-in.-diameter nib. For large marks, fatter nibs, such as those 9⁄16 in. in diameter, tend to work well.
But not everything about nib size is so straightforward. For instance, you also need to consider what the nib is made of. For many industrial applications, a polyester nib works well because of its impact resistance. These tend to hold their shape over time, instead of going flat, which widens your mark and, in turn, the chance for someone to write something illegible on a part.
Still, polyester nibs aren’t for every application. For instance, if you’re marking on a rough or dirty surface, you might want to choose a marker with an acrylic nib, commonly used in enamel markers. These tend to file down and conform to a rough surface. For such applications, acrylic nibs generally will last longer than polyester nibs.
Right Tool for the Job
All markers spread a little after being applied, and on metal especially, this can lead to illegible marks. When someone with the right marker (with the appropriately sized tip) writes a 3, it shouldn’t look like an 8—though quite often it does, and a misread part number or any other work instruction can lead to an expensive mistake.
These problems usually occur because the surface is oily, rusty, dirty, or otherwise contaminated or corroded. Many steels come delivered with a rust-inhibitor oil on the surface, which can create problems for parts marking; many conventional markers just don’t work at all. The paint from the marker is basically floating on top of the oil coat, and as a result, you get smeared or illegible text. These conditions call for a marker with oleophobic-formulated paint, which basically pushes the oil out of the way and allows it to dry through oil.
Wet surfaces call for a marker with hydrophobic-formulated paint, which resists spreading and will dry through water or water-based liquids. These are ideal for postmachining applications as well as those involving plasma cutting, water quenching, and writing through water-based cutting fluids and coolants.
What about a painted surface? For most applications, fabricators want the paint to cover the welding, layout, and part identification marks, but not always. Some fabricators now use markers formulated to show through water- or solvent-based paint. Technically, the mark visible after painting isn’t the original mark but instead the result of a chemical reaction. Specifically, the chemicals in the marker start to react with the chemicals in the primer and paint. About 30 seconds after the paint is applied, the marks again appear on the painted surface.
Rusty, dirty, or scaling surfaces require a more viscous formula that will cut through the debris and reach the base material, as well as a nib that can allow for continuous paint flow without clogging.
Finally, many materials require heat treating or annealing to achieve the desired strength, which can cause marks to burn off or become illegible. Surviving this process, again, has to do with how a paint marker works. The chemical bonds between the resin and pigment are designed to work best within a certain temperature range. When you go outside that range, the bonds break down, and the mark fades or disappears. This is why a specialty paint formula with high-temperature-resistant pigments and resins must be used.
Permanent Versus Removable
Most jobs call for permanent marks; however, whether for quality control, repair work, or for finished goods requiring paint, marks sometimes need to be removed.
If you need to remove marks from parts before shipping products to customers, you’ll need to consider the cleaning chemicals required. When possible, try to use a marker that can be removed as safely and with as little discomfort as possible. Removing a mark with an extremely aggressive solvent can bring up safety and environmental concerns. If a marker requires you to use a cleaner that violates government regulations on volatile organic compounds (VOCs), unintended costs can really mount, all because of a marker.
The nature of the resin used in the paint marker determines how the mark may be removed. When the resin breaks down, the mark wipes away. Today some industrial markers don’t require extremely aggressive cleaners. Some resins break down with water; some break down with slightly more acidic detergent solutions, like Windex® (anything 10 pH or higher), suited for marking on products that may be stored outside and so needs to endure rain, but still needs to be removed easily. Still others require more aggressive cleaning.
Ensure the paint marker doesn’t use any dangerous solvents, either for removal or in the marker chemistry itself. For instance, a common enamel marker solvent called xylene has been linked to some types of cancer. Today, though, safer alternatives to xylene exist and offer the same durability. If needed, these marks can be removed with common shop chemicals that aren’t harmful if workers take the appropriate safety precautions.
Marking Strategies
No matter how perfectly suited an industrial marker is for an application, the marker can’t help you if you can’t find it or use it efficiently. For instance, most fabricators wear some kind of glove most of the day, so caps or lids need to be designed so people can remove them easily with work gloves (see Figure 2).
A marker cap sticking out from the front coverall pocket helps paint the picture of the quintessential metal fabricator. If the marker doesn’t stay with the worker, or belongs at a specific workstation, some fabricators have found some creative solutions to ensure no marker goes missing. Some have made the marker cap, with a strong adhesive or another method, a permanent part of the workbench or shadow board. Workers pull the marker off the cap, use it, and then snap it back onto the cap attached to the workbench. This gives people an immediate visual cue. If a cap on the workbench or shadow board is missing its marker for an extended period, the marker may be missing.
More to Markers
So many people in metal fabrication use a marker daily. They’re used constantly, and one can be completely different from another, just as one file grinder can be completely different from another file, or one welding gun different from another. Ultimately, a marker isn’t just a marker, and a little bit of research into the right marker for the job can help you do the job better, faster, and easier, while reducing waste and costs.
This Article was originally featured in the August 2015 editition of The FABRICATOR®.

Comments 0